
Fortnite Chapter 2 – Season 3 has come with many changes, and players are still trying to find out the best loadout.
The new items introduced this season have not completely been included into the Arena and Tournaments playlists. Surprisingly, previous season introductory items (which include “Crashpads”) are now in competitive playlists.
Keeping this in mind, let’s take a look at how to use the newly introduced Charged-Shotgun. Also, keep reading for some insane over-powered tips and tricks using the Crashpad!
Charged Shotgun
The meta/strategy for close-range battle has drastically changed in Chapter 2 – Season 3. Yup, everything from box-fighting to rushing players has to be planned and executed in a different manner altogether.
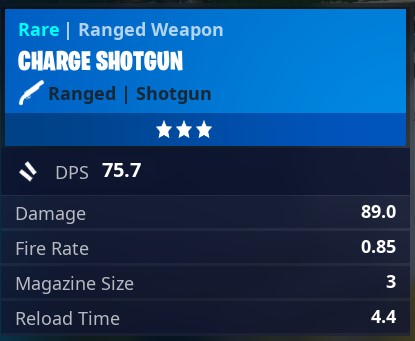
The Tactical Shotgun has been nerfed drastically and needs more shots to completely finish a player. Players no longer have the Pump-Shotgun. Instead, they have to choose between the Tactical Shotgun and the Charged Shotgun.
Hence, let’s break down how to use the Charged Shotgun.
The first thing to note is that the Charge Shotgun takes way more time to shoot compared to its predecessor the Pump Shotgun. Keyboard players can assign the function “Fire” to the scroll-wheel up/down and use it to get an instant pop from the shotgun. For controller players, there’s no such trick apart from spamming the fire button twice for the gun to shoot faster than the normal fire-rate. They keyboard trick sounds too good to be true and might get patched pretty soon as there is a clear advantage by landing faster shots.
When you hold down the fire button for a while the shotgun gets charged for lengthier and more powerful shots. As frustrating as it is to wait and charge your shotgun each time, the range added to the shotgun is insane and has to be mastered to keep up with the competitive meta. Check out the range of this gun below,
The previous standard Shotgun meta was to take a shot first, place a wall to block the opponent’s shot, edit for another shot, Reset the wall to block again, and repeat this process till the enemy was knocked. With the Charged Shotgun, the whole meta changes drastically because of the added delay to the shotgun each time a shot is fired. Hence, every time you place a build or perform an edit, you can’t instantly take your shots. Instead, You’ll have to pause for a moment to charge your shotgun before releasing it to take a shot.
After using the Charge-Shotgun for about a month, here are a few tips and tricks to use the charged shotgun in a more effective way.
2 Tips and tricks with the Charged-Shotgun
The Door Trick: While box fighting, the ideal strategy was to place a window, shoot and then reset the wall. Instead of the window, if you place a door, you could charge your Shotgun while opening the door to land a heavier shot which might even eliminate a fully shielded player. This is not possible with the Tactical Shotgun no matter which grade it is.
Peekers Advantage: The Right-hand peekers advantage is insane using the Charged shotgun. If you’re peeking towards the right-hand side make sure you position your reticle on the edge of any wall to take shots without being seen by the player on the other side. Check out both perspectives below,
In sticky situations where you are trapped in an opponent’s box or you simply can’t get away from those w-keying psychos, this Shotgun and a smart crosshair placement can do wonders. No matter how good your opponent is, you’d always have the opportunity to land your shot first as he has a delay each time he attempts to place a build or perform an edit. Focus on landing a headshot and you’d see players backing out from fights instantly.
For aggressive playstyles, it’s best to rush opponents when you’re on height and you’re taking shots on opponents sweating it out right below you. This is where the range of the gun comes into play as it can hurt opponents who are even two floors below you. The same applies while third partying from low-ground on opponents who are sweating it out on height. As long as you have the time and space to move about with this shotgun, making use of its range and fully-charged damage is key to unlock the most optimal close-range meta for Season 3.
THE BONUS SECTION: OVERPOWERED CRASHPAD STRATEGIES!
None of the pro-players were really excited about crashpads last season as it was not included in Tournaments/Arena playlists. Now that it’s included in Season 3, players have discovered some insane tricks to get into opponents boxes, retake height and much more.
Take a look at the video below in which the user ” Ryuzanami” has explained how to use the crashpad in different stages of the game,
Among the many tricks he mentions, the first one demonstrates the best way to use the crashpads while rushing an opponent. He places a cone outside the opponent’s box and uses the crashpad strategically to enter into the box. You can use this strategy to replace and retake walls as well. The only way any player can counter this start is by staying inside the box with a “U’ shaped ramp in it. Here’s another technique you could use to enter into an opponent’s box from the roof of his box.
Wait! There’s more. Remember the “Double – Heavy Sniper” meta in which you fire two shots back to back and take out a boxed-up opponent? Well, you could do something similar with the crashpads as well. Throwing a crashpad on any wall instantly destroys the wall giving you many options to proceed with. This strat allows you to take on opponents who are turtled-up 27 meters away from you. Mark the opponent’s box and make sure you’re 27 meters away from it. Throw the crashpad (check the angle shown in the video) towards the opponent’s box. For the final step, pull out your sniper and scope into the box for an easy shot on an opponent who is now exposed without any builds in front of him.
That’s it for this week’s guide! Hope you all are doing well. Do post your thoughts in the comments section below, what practice routines you’ve been following this season?